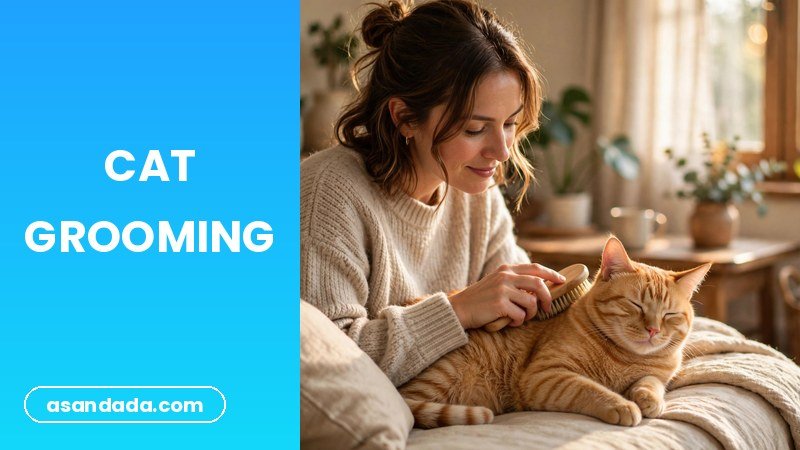
Learning how to groom a cat at home for beginners starts with one simple idea: grooming is mostly maintenance, not a makeover. Your cat already does a big chunk of the work — cats spend up to five hours a day licking their coats — but brushing, nail trims, and ear checks still fall on you. The good news is that none of it is complicated. When I brought home my first rescue, a nervous grey shorthair named Pepper, she flinched at the brush for two weeks straight. Within a month, she was purring through it. With the right tools and a patient routine, most cats learn to tolerate — and some genuinely enjoy — being groomed.
This guide walks you through the full home grooming routine: the tools you actually need (skip the fancy kits), how to brush by coat length, how to trim nails without hitting the quick, and the basics of ear cleaning. There’s also a frequency table at the end so you always know what’s due.
What You’ll Need: A Simple Grooming Toolkit
You don’t need a professional kit. These five tools cover about 95% of home cat grooming:
- Slicker brush or bristle brush (short hair). A stainless-steel slicker brush handles most short-haired cats. For very short, fine coats, a soft bristle brush works too.
- Wide-tooth metal comb (long hair). This is the real workhorse for Persians, Maine Coons, and Ragdolls. It finds tangles a slicker brush glides over.
- Dematting tool or mat splitter. For tangles that have started to tighten. Never pull a mat out by force.
- Guillotine or scissor-style cat nail clippers. Scissor-style (like small scissors with curved blades) give beginners more control. Get cat-specific clippers — human nail clippers can crush a cat’s nail.
- Styptic powder. A just-in-case item. If you nick the quick and there’s a drop of blood, a pinch of styptic powder stops it fast.
- Cotton balls or soft gauze. For ear cleaning. Never use cotton swabs inside the ear canal.
Optional but nice: a rubber grooming mitt for cats that hate brushes, and a vet-approved ear cleaning solution (ask your vet which one to buy). Treats are not optional — they are, in my experience, the single most effective grooming tool you own.
Keep everything in one small box or caddy. If your tools live in five different drawers, you’ll keep putting grooming off.
How to Brush Your Cat: Technique by Coat Length
Brushing is the core of home grooming. It removes loose hair (less shedding on your couch), reduces hairballs, and lets you check your cat’s skin for lumps, scratches, or parasites while you’re at it.
Short-haired cats
Frequency: once or twice a week. During spring and fall shedding seasons, bump it to every other day.
Technique: Let your cat get comfortable first — lap, sunny spot, wherever they’re relaxed. Stroke with the grain of the fur using light pressure, working in sections: shoulders, back, sides, then the chest if your cat allows it. Most cats dislike their belly and tail being brushed, so skip those spots at first and add them in only if your cat stays calm.
Use short, gentle strokes with a slicker brush, then finish with a few passes of a bristle brush to smooth things down. Watch for body language the whole time: a swishing tail, flattened ears, or rippling skin along the back means “I’m done.” Respect that immediately — a grooming session that ends on a good note makes the next one easier. Each session can be as short as three to five minutes. Two minutes of calm brushing beats ten minutes of wrestling.
For cats that hate brushes, try a rubber grooming mitt first. You literally just pet them, and the mitt pulls out loose hair. Pepper switched to a real brush after three weeks of mitt-only sessions.
Long-haired cats
Frequency: daily. This is the one grooming rule you can’t bend. Long hair tangles fast, and a tangle becomes a mat in days.
Technique: Start with the wide-tooth metal comb, not the brush. Work in layers: lift a section of fur with one hand and comb from the ends inward, never dragging the comb through a tangle. The spots that mat first are always the same — behind the ears, under the chin, the armpits (“legpits”), the belly, and around the rear end. Comb these areas every single day even if the rest of the cat looks fine.
If you find a tangle, hold the base of the fur near the skin so you’re not pulling, then work the comb through gently. For a mat that won’t budge, use a mat splitter to carefully cut it apart — and if a mat is tight against the skin, stop and see a vet or a professional groomer. Cutting a skin-tight mat with scissors is how home grooming accidents happen, because it’s easy to cut the skin underneath.
A trick for cooperative longhairs: brush in the evening when they’re sleepy. My neighbor’s Ragdoll gets her full comb-out at 9 PM while half-asleep on the sofa, and she’s never fought it. A short play session beforehand helps too — a cat who’s burned off energy through interactive play sits stiller for grooming.
Kittens and senior cats
Start kittens early — even just thirty seconds of gentle brushing at 8 to 10 weeks — so grooming becomes normal background noise in their lives. With senior cats (10+ years), be gentler around joints and check for mats more often, since older cats groom themselves less thoroughly. Arthritic cats in particular appreciate help reaching spots they can’t.
How to Trim Your Cat’s Nails Safely
Indoor cats need nail trims because they don’t wear their claws down the way outdoor cats do. Most indoor cats need a trim every 2 to 4 weeks. If you can hear clicking when your cat walks across hard floors, they’re overdue.
Step-by-step nail trimming
- Pick your moment. Choose a calm, sleepy time — after a meal or a play session, not mid-zoomies. Sit your cat on your lap or beside you, facing away.
- Get the paw ready. Gently press the pad of one toe so the claw extends. You’ll see the nail clearly.
- Find the quick. On a light-colored nail, the quick is the pink area inside the nail where the blood supply runs. You trim only the sharp, curved tip — staying 2 to 3 millimeters away from the quick. On dark nails where you can’t see the quick, trim only the very tip, 1 to 2 millimeters, or ask your vet to show you on the first visit.
- Cut at a slight angle. Position the clippers and cut the tip in one smooth motion. A clean, confident cut is kinder than a hesitant squeeze.
- Reward. Treat after every paw, or even every nail at first. Pepper got a treat per nail for her first month; now she gets one per paw.
- Don’t do all four paws at once if your cat is new to this. One paw a day across four days is perfectly fine. Build up gradually.
If you nick the quick
It happens to almost everyone once. Stay calm — it looks worse than it is. Apply a pinch of styptic powder to the nail tip and hold gentle pressure for a few seconds. The bleeding usually stops within minutes. Your cat will forgive you, especially if there’s a treat involved. If bleeding doesn’t stop after 10 minutes of pressure, call your vet.
What NOT to do
Never restrain a terrified cat and force through all 18 nails. A panicked cat learns that clippers equal danger, and you’ll pay for it next time. And please never consider declawing as an alternative to nail trims — it’s the amputation of the last bone of each toe, it’s banned or restricted in many places, and regular trimming plus a scratching post solves the same problem without surgery. If scratching is your concern, see my guide on how to stop a cat from scratching furniture — nail trims are actually one of the methods there.
Ear Cleaning Basics
Most cats’ ears need very little from you. A healthy cat ear is pale pink, clean, and odor-free. Your job is mainly to look — a quick ear check once a month catches problems early.
How to check: Gently fold the ear flap back and look inside. You’re looking for dark brown or black waxy buildup, redness, swelling, a bad smell, or your cat scratching at their ears or shaking their head a lot. Any of those are reasons to see a vet, not to dig deeper yourself.
How to clean (light cleaning only): If there’s a small amount of visible wax on the outer ear, dampen a cotton ball with a vet-approved ear cleaner, wipe only the parts you can see, and stop. Never insert anything into the ear canal — no cotton swabs, no fingers. The ear canal in cats is L-shaped and easy to damage.
When to see the vet instead: heavy dark debris (possible ear mites), strong odor, redness, swelling, head tilting, or pain when you touch the ear. Ear infections and mites need diagnosis and prescription treatment — home cleaning won’t fix them and can make things worse.
Bathing: Do Indoor Cats Need It?
Usually, no. Indoor cats are self-cleaning machines, and most go their whole lives without a bath. Give a bath only when there’s a real reason: something sticky or smelly in the fur, flea dirt confirmed by your vet, or a medical shampoo your vet prescribed.
If you must bathe: use lukewarm water, a cat-specific shampoo (never human shampoo or dog shampoo — the pH is wrong and some dog products contain ingredients toxic to cats), and keep water out of the ears and eyes. Work fast, rinse thoroughly, and towel-dry in a warm room. And expect that most cats will hate it — that’s normal, not a sign you’re doing it wrong.
Grooming Frequency Table
| Task | Short hair | Long hair | Notes |
|---|---|---|---|
| Brushing | 1–2× per week | Daily | Increase during spring/fall shedding |
| Nail trim | Every 2–4 weeks | Every 2–4 weeks | Clicking on floors = overdue |
| Ear check | Monthly | Monthly | Look, don’t dig; vet for redness/odor |
| Ear cleaning | Only if light wax visible | Only if light wax visible | Cotton ball on outer ear only |
| Bath | Rarely, only if needed | Rarely, only if needed | Cat-specific shampoo only |
| Dental check | Monthly look | Monthly look | Ask your vet about dental care |
| Skin check | During each brushing | During each combing | Feel for lumps, mats, fleas |
Common Grooming Mistakes Beginners Make
- Marathon sessions. Ten stressed minutes undo a week of trust-building. Keep it short and end while your cat is still happy.
- Punishing the cat for squirming. Hissing or swatting means “stop,” not “misbehave.” Punishment makes grooming harder every time.
- Skipping the “boring” areas. Armpits, belly, and behind the ears are where mats start. Five seconds of attention there beats a vet visit later.
- Trimming nails too short “to make them last longer.” Cutting close to the quick doesn’t buy you extra time — it buys you a bleeding, frightened cat. Trim more often, cut less each time.
- Using the wrong products. Dog shampoo, essential oils, and scented baby wipes have no place in cat grooming. Essential oils are toxic to cats, full stop.
FAQs: Home Cat Grooming
How often should I brush my indoor cat?
Short-haired cats do well with one or two brushing sessions per week; long-haired cats need daily combing to prevent mats. Increase frequency during spring and fall, when most cats shed their undercoat.
My cat hates being brushed. What should I do?
Start smaller: thirty seconds with a rubber grooming mitt, then a treat, then stop. Gradually lengthen sessions over a few weeks. Many cats that hate brushes accept a mitt because it feels like petting. If your cat gets aggressive — biting, hard swatting — stop and ask your vet whether pain (like arthritis or skin sensitivity) might be the cause.
Can I use human nail clippers on my cat?
It’s not ideal. Human clippers are shaped for flat nails and can crush or split a cat’s curved claw. A $10 pair of scissor-style cat clippers is a worthwhile upgrade and gives you much better control.
How do I know if my cat has ear mites?
Possible signs include dark, coffee-ground-like debris in the ears, frequent head shaking, and scratching at the ears. But only a vet can confirm mites with a proper exam — don’t guess and don’t treat it yourself. Take your cat in.
What should I do about a tight mat I can’t comb out?
Don’t cut it with scissors — the skin under a mat is easy to nick because mats pull the skin up into them. Try a mat splitter gently, and if the mat is tight against the skin, have your vet or a professional groomer remove it. For long-haired cats, some owners keep the fur around the rear trimmed short (a “sanitary trim”) to prevent messes — your vet or groomer can show you how.
Final Thoughts
Home grooming is less about technique and more about routine. A few minutes of brushing, a monthly nail check, and a quick look in the ears — done calmly and consistently — will keep an indoor cat comfortable and healthy for years. Pepper still isn’t thrilled about nail trims, but she hops onto the couch when she sees the brush now, because grooming became part of our evening together. Start slow, keep treats handy, and let your cat set the pace. For the full first-time-owner picture, read how to take care of a kitten for beginners — grooming is just one piece of the daily care puzzle.
This content is for informational purposes only and isn’t veterinary advice. If your cat shows signs of illness, consult your veterinarian.